Alcohol markers are a powerful tool for artists, but they come with a learning curve. In this article I’m sharing my top tips, which cover all the things I wish someone had explained to me when I was first learning how to use these markers over a decade ago. Read the full guide, and pay attention to the tip number six, I can say without doubt that it was a game-changer for me!
Tip 1: Choose the Right Paper
The paper you use with alcohol markers is crucial. It can make or break your experience because alcohol markers unlike water markers require the right texture and absorbency to work effectively. The wrong paper can lead to bleed-through, feathering, and difficulty blending.

To avoid these issues, use paper specifically designed for alcohol markers. Some of my favorites are:
- X-Press It Blending Card: Ideal for smooth blending.
- Smooth Bristol Board: Another excellent option.
- Strathmore and Canson Papers: Both brands offer quality papers for alcohol markers.
- Ohuhu Marker Sketchbooks: Great for those on a budget.
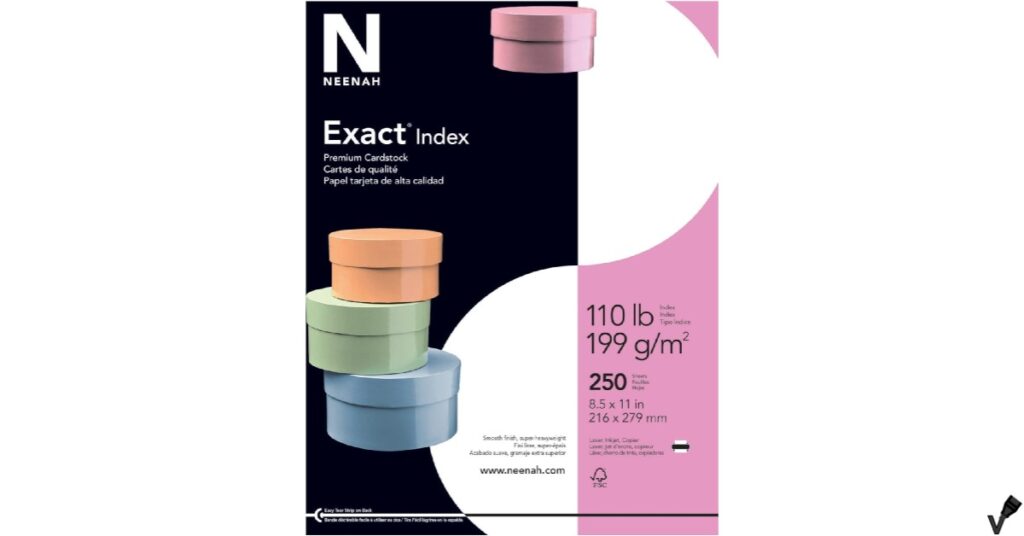
If you’re really pinching pennies, consider using cardstock. I used Neenah Exact Index, bright white, 110-pound cardstock for many years. While it’s not perfect, it gets the job done.
Avoid using regular printer paper or drawing paper, as they don’t handle the ink well, leading to feathering or difficulty blending. Watercolor paper should also be avoided since it absorbs the ink too quickly and can cause pilling.
Tip 2: Master Your Coloring Speed
When using alcohol markers, the speed at which you color is critical. It may sound contradictory, but you need to color both slowly and quickly.
- Slow Coloring: If you color too fast, your work will be streaky. To achieve smooth blends, move slowly enough to saturate the paper.
- Quick Coloring: You must also color fast enough to prevent the ink from drying out. If the ink dries before you’re done blending, it becomes difficult to achieve smooth transitions.
As you gain experience, this balance will become second nature.
Tip 3: Create a Color Chart
If you’re serious about using alcohol markers, creating a color chart is essential. It helps you match the color name on the cap to the actual color and speeds up the process of choosing colors for blending.

Many brands include blank color charts in their marker sets, but you can also print out a custom chart or swatch colors in a sketchbook. Having a color chart saves time, and you’ll know exactly which shades blend well together.
Tip 4: Keep Track of Your Favorite Blends
Once you’ve discovered colors that blend beautifully, make a note of them! I like to keep a sketchbook where I record my favorite blends. Over time, you’ll start to memorize these combinations, but until then, writing them down can be a real time-saver.
For Copic users, you might have heard about Copic Blending Formulas, which suggest blending colors from the same family and with similar numbers. However, I encourage you to experiment with blends that don’t follow these rules. You’ll often find that breaking the rules results in more dynamic and visually appealing artwork.
Tip 5: Plan Your Colors in Advance
Before diving into your actual artwork, always plan your colors and blends on a spare piece of paper. This helps you avoid costly mistakes, as alcohol markers are not very forgiving. It’s not like acrylic paint, where you can simply paint over an error.
For almost every piece of marker art I create, I test my colors on a scrap piece of paper or a printout of my artwork. This habit ensures that the final piece turns out as you envisioned.
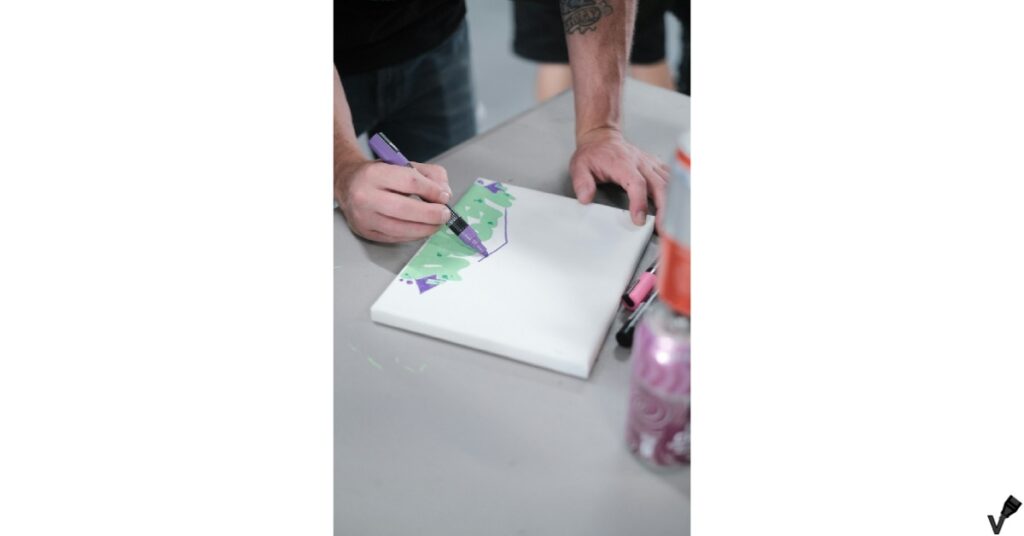
Tip 6: There’s No One Correct Way to Blend
This tip was a huge revelation for me when I was a beginner: there is no single correct way to blend alcohol markers. Some artists swear by blending from dark to light, while others prefer light to dark. Both methods are valid, and each can produce stunning results.

I recommend experimenting with both techniques to find what works best for you. Blending from light to dark is generally easier for beginners because it’s simpler to darken an area than to lighten it. However, blending from dark to light can save ink and time once you’re more familiar with the markers.
Tip 7: Keep Your Markers Juicy
Alcohol markers blend best when they’re full of ink. If your markers start to dry out, blending becomes difficult. If the brand you’re using offers refills, be sure to top off your markers regularly.
Here’s a great tip I’ve picked up: use a scale to weigh your markers. For example, a fully inked Copic Sketch marker weighs between 14 and 14.5 grams with both caps on. If it weighs less than 13 grams, it’s time to refill it. Weighing your markers removes the guesswork and makes the refilling process much easier.
Tip 8: Combine Alcohol Markers with Other Media
While alcohol markers are versatile, combining them with other media can take your artwork to the next level. I love using colored pencils to add subtle shadows and highlights over my marker work. You can also use gel pens, paint pens, and acrylics to add pops of color and detail.
For instance, I often use a white colored pencil or paint pens over alcohol markers to create highlights that really stand out. Don’t be afraid to mix media—doing so can help you achieve effects that markers alone might not offer.

Conclusion
I hope these tips help guide you on your journey to mastering alcohol markers! Whether you’re a beginner or have been using these tools for a while, understanding the nuances of paper types, blending techniques, and color planning can truly transform your work. The right materials and techniques make a world of difference, and by applying these tips, you’ll likely see improvements in both the ease of use and the quality of your results.
Happy drawing, and may your artwork continue to evolve!
FAQs
-
What type of paper should I use with alcohol markers?
To achieve the best results with alcohol markers, it’s essential to use paper designed for alcohol markers. Some excellent choices include X-Press It Blending Card, Smooth Bristol Board, and papers from Strathmore or Canson. Cardstock, such as Neenah Exact Index, is a more affordable option, but avoid regular printer paper or watercolor paper as they don’t handle alcohol ink well. -
How do I blend alcohol markers effectively?
The key to blending alcohol markers effectively is balancing your coloring speed. You should color slowly enough to saturate the paper and allow smooth blending, but quickly enough to prevent the ink from drying before blending. Using alcohol marker paper will help keep the ink damp for longer, making blending easier. -
Should I create a color chart for my alcohol markers?
Yes, creating a color chart is highly recommended. It allows you to see the actual marker colors at a glance, making it easier to choose and blend shades. Many brands offer blank color charts, or you can create your own by swatching and labeling colors in your sketchbook. A color chart saves time and enhances your blending process. -
Is it necessary to plan colors and blends before using alcohol markers?
Yes, planning colors and blends in advance is a great way to avoid mistakes. Since alcohol markers are not forgiving and difficult to correct, testing colors on a spare piece of paper before applying them to your artwork is a safe practice. Pre-planning ensures that your final piece turns out as intended. -
What are the different ways to blend alcohol markers?
There is no single correct way to blend alcohol markers. You can blend from dark to light or light to dark, and both methods can work beautifully. Experimenting with different techniques will help you discover what works best for your style. Beginners may find blending from light to dark easier, but as you gain experience, both approaches become useful.