
Key Highlights
- Paint markers are versatile and offer vivid colors easy application.
- Paint Markers are perfect for a wide range of art projects, from hand lettering creating intricate designs.
- Paint markers are available in various tip styles, such as fine tip, brush tip, and chisel tip, allowing artists to achieve different effects.
- They are compatible with different surfaces, including paper, canvas, wood, glass, and more.
- Acrylic paint markers provide opaque coverage and are known for their long-lasting, fade-resistant qualities.
- With the right techniques and care, beginners can create stunning artwork using acrylic paint markers.
- Key Highlights
- Introduction
- Exploring the World of Paint Markers
- Preparing to Use Paint Markers
- The Beginner's Guide to Using Paint Markers
- Tips and Tricks for Paint Marker Beginners
- Creative Projects to Start with Paint Markers
- Caring for Your Paint Markers
- Advanced Techniques for Seasoned Artists
- Conclusion
- Frequently Asked Questions
Introduction
Paint markers have become increasingly popular among artists, crafters, and hobbyists due to their versatility and vibrant colors. These markers are a convenient and mess-free alternative to traditional brushes and paints. With their opaque coverage and quick-drying properties, acrylic paint markers allow artists to create stunning artwork on a variety of surfaces.
Whether you’re a beginner or an experienced artist, understanding the basics of paint markers is essential to unleash your creativity. In this beginner’s guide, we will explore the world of paint markers, including what they are, the different types available, and how to use them effectively. We will also provide tips and tricks for beginners, creative projects to try, and advice on caring for your paint markers.
By the end of this guide, you’ll have a solid foundation in using paint markers and be ready to embark on your artistic journey with confidence. So let’s dive in and discover the exciting world of acrylic paint markers!
Exploring the World of Paint Markers
Paint markers are a type of marker that contains paint instead of ink. They are known for their vibrant, opaque colors and versatility. Paint markers are available in various types, including acrylic paint markers. Acrylic paint markers use acrylic paint, which is a fast-drying, water-based paint that offers excellent coverage and durability.
One of the key features of paint markers is their opacity. Unlike regular markers that can be translucent or semi-transparent, paint markers provide solid, opaque coverage on a variety of surfaces. This makes them ideal for creating bold, vibrant artwork that stands out.
With their smooth application and vibrant colors, paint markers are popular among artists, crafters, and DIY enthusiasts. They can be used on a wide range of materials, including paper, canvas, wood, glass, metal, plastic, and more. Whether you’re creating fine art, customizing objects, or adding details to your craft projects, paint markers offer a convenient and versatile solution.
What Are Paint Markers?
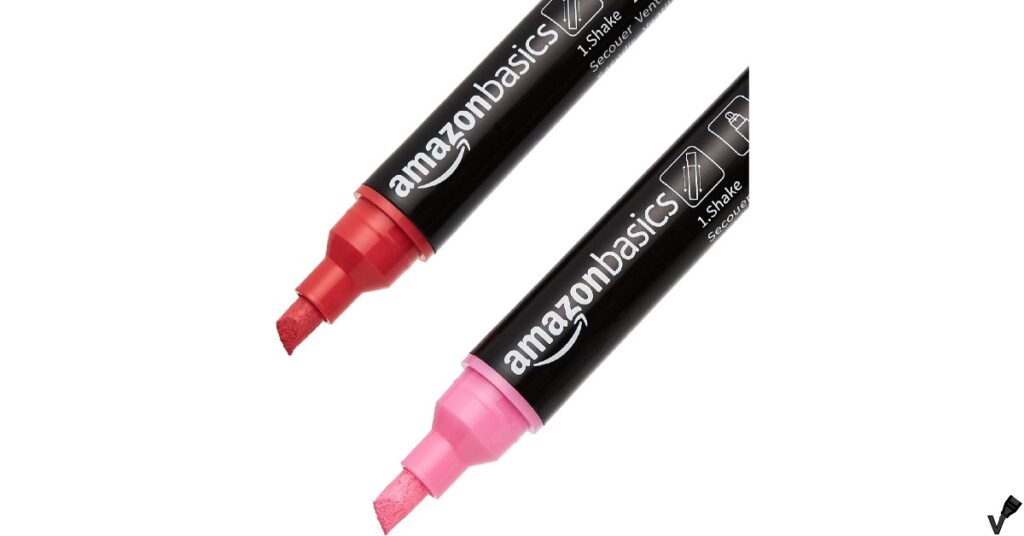
Paint markers are markers that contain paint instead of traditional ink. They are typically made with a valve system that controls the flow of paint to the marker tip. When the valve is pressed, the paint is released onto the surface.
Unlike traditional markers that use dye-based or pigment-based inks, paint markers use acrylic paint. Acrylic paint is a water-based paint that dries quickly and offers excellent color vibrancy and coverage. It is known for its durability and resistance to fading.
The paint in paint markers is typically stored in a reservoir or cartridge within the marker. When pressure is applied to the marker tip, the valve system releases the paint onto the surface, allowing for precise and controlled application. This makes paint markers an ideal tool for artists who want to create detailed artwork or add vibrant colors to their projects.
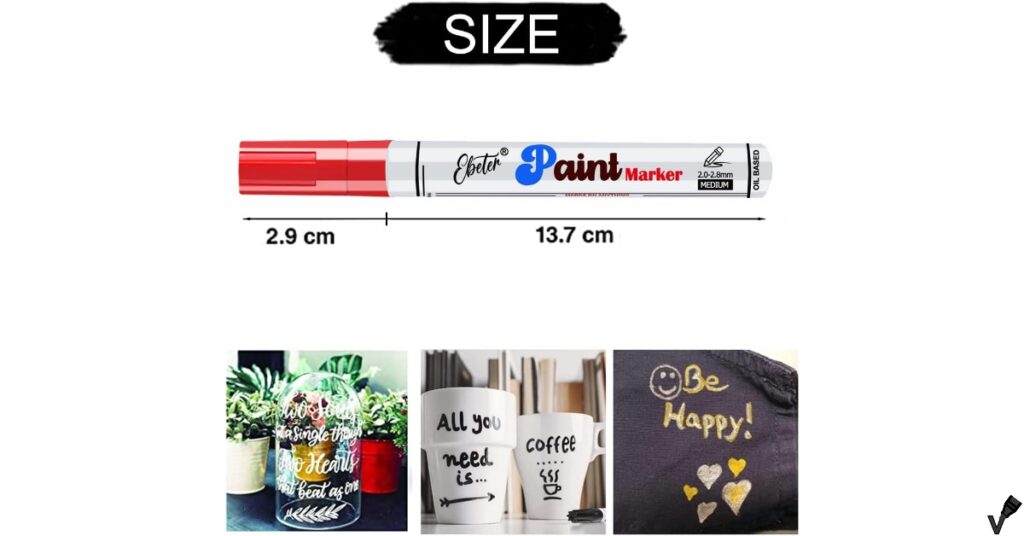
Paint markers come in a variety of tip styles, including fine tip, brush tip, chisel tip, and more, allowing artists to achieve different effects and line thicknesses. They are available in a wide range of colors, including metallics and fluorescents, giving artists the freedom to express their creativity.
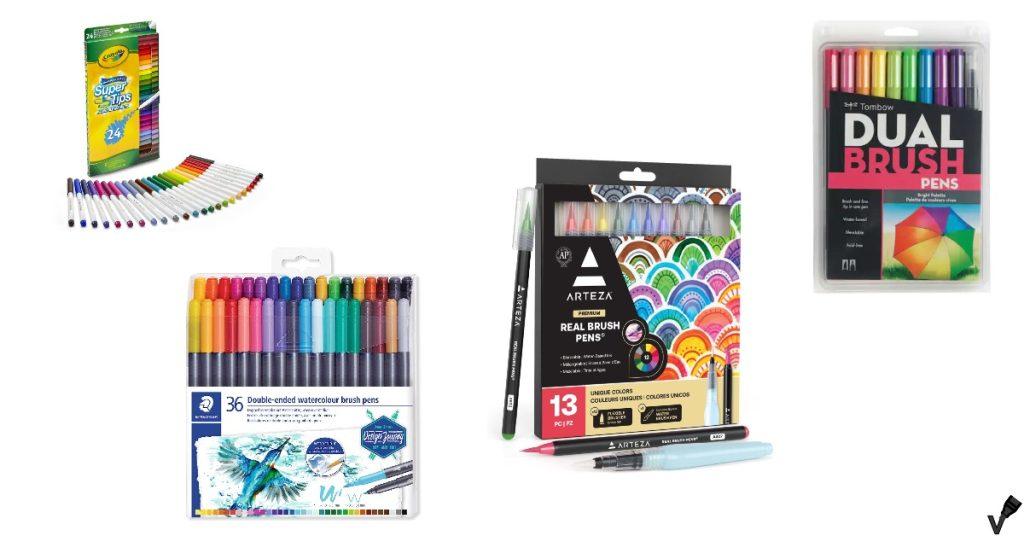
Types of Paint Markers and Their Uses
There are several types of paint markers available, each with its own unique features and uses. Here are some of the most common types:
- Liquid Paint Markers: These markers contain a liquid paint that flows smoothly and provides excellent coverage. They are great for creating detailed artwork and fine lines.
- Solid Paint Markers: Solid paint markers contain a solid, oil-based paint that is activated by pressure. They are perfect for marking on rough surfaces and can be used on materials such as metal, wood, and concrete.
- Fine Tip Paint Markers: These markers have a fine tip that allows for precise and detailed work. They are commonly used for hand lettering, outlining, and adding small details to artwork.
- Brush Tip Paint Markers: Brush tip markers have a flexible brush-like tip that mimics the effect of a paintbrush. They are ideal for creating broad strokes, blending colors, and adding texture to artwork.
Preparing to Use Paint Markers
Before using paint markers, it’s important to gather all the necessary art supplies and ensure that you have everything you need for a smooth and enjoyable painting experience. Here are some things to consider:
- Art Supplies: Gather your paint markers, paper or canvas, a palette for mixing colors, a rag or paper towel for cleaning the markers, and any additional tools you may need for your specific project.
- Replacement Tips: It’s a good idea to have replacement tips on hand in case the tips of your paint markers become worn or damaged. This will ensure that you can continue using your markers without any interruptions.
Essential Supplies for Starting
To get started with paint markers, you’ll need a few essential supplies. Here’s a list of what you’ll need:
- Fine Point Paint Markers: Fine point markers are great for adding details and intricate designs to your artwork. They allow for precise lines and controlled strokes.
- Medium Tip Paint Markers: Medium tip markers are versatile and can be used for both broad strokes and finer details. They are a good choice for general painting and outlining.
- Art Markers: In addition to paint markers, consider using art markers in different colors to complement your artwork. They can be used to add shading, highlights, and additional details.
- Paper or Canvas: Choose a high-quality paper or canvas that is suitable for use with paint markers. Make sure it has a smooth surface that will allow the paint to adhere well.
Setting Up Your Workspace
Setting up a suitable workspace is essential for working with paint markers. Here are some tips to help you create an ideal workspace:
- Choose a flat and stable surface: Ensure that your workspace is flat and stable to prevent any accidents or spills. A table or desk with a smooth surface is ideal.
- Use a protective cover: Place a protective cover, such as a plastic sheet or old newspaper, over your workspace to protect it from any potential paint splatters or spills.
- Prepare a rough surface: If you’re working on a rough surface, such as wood or canvas, you may need to prime it before using the paint markers. This will help the paint adhere better and prevent any bleeding or smudging.
- Organize your supplies: Keep your paint markers and other art supplies organized and easily accessible. This will make it easier for you to find what you need and keep your workspace tidy.
The Beginner’s Guide to Using Paint Markers
Using paint markers can seem intimidating at first, but with a little practice and the right techniques, you can achieve stunning results. Here is a beginner’s guide to using paint markers:
- Step 1: Understanding Your Paint Marker: Familiarize yourself with the different parts of the paint marker, such as the valve system and the nib. This will help you understand how to control the flow of paint and create different effects.
- Step 2: Priming Your Paint Marker: Before using a new paint marker, it’s important to prime it to ensure a smooth and consistent flow of paint. Follow the manufacturer’s instructions for priming the marker.
- Step 3: Basic Techniques for Application: Experiment with different techniques, such as stippling, blending, and hatching, to create different textures and effects. Practice on a scrap piece of paper or canvas before starting your main artwork.
- Step 4: Layering Colors with Paint Markers: Paint markers are great for layering colors to create depth and dimension in your artwork. Start with lighter colors and gradually build up darker shades.
- Step 5: Sealing Your Artwork: Once you have finished your artwork, consider sealing it with a varnish or fixative to protect the paint and ensure its longevity.
Step 1: Understanding Your Paint Marker
Before you start using paint markers, it’s important to understand how they work. Each paint marker has a valve system that controls the flow of paint. The valve can be opened or closed by pressing down on the marker’s nib.
To activate the paint flow, press down on the nib several times until the ink begins to flow. This will ensure that the paint is evenly distributed throughout the marker.
One of the key features of paint markers is their opaque ink. This means that the colors are vibrant and solid, with excellent coverage. The opaque ink allows you to create bold and vibrant artwork on a variety of surfaces.
Understanding how the valve system and opaque ink work together will help you achieve the best results with your paint markers.
Step 2: Priming Your Paint Marker
Priming your paint marker is an important step to ensure a smooth and consistent flow of paint. This is especially important for new markers or markers that haven’t been used in a while.
To prime your paint marker, follow the manufacturer’s instructions. This typically involves shaking the marker well to mix the paint, then pressing down on the nib to release the ink. Repeat this process several times until the paint flows smoothly.
For markers with a pump action, you may need to pump the nib up and down to prime the marker. This will help the ink flow to the nib and ensure even coverage.
Priming your paint marker will ensure that the ink flows smoothly and consistently, allowing you to create your artwork without any interruptions.
Step 3: Basic Techniques for Application
There are several basic techniques you can use when applying paint markers to create different effects and textures in your artwork.
- Hand Lettering: Paint markers are perfect for creating bold and vibrant lettering. Experiment with different styles and sizes to create unique and eye-catching designs.
- Vivid Colors: Paint markers offer vibrant and vivid colors that can make your artwork stand out. Use a variety of colors to create contrast and make your artwork more visually interesting.
- Blending: Paint markers can be blended together to create smooth transitions between colors. Use a brush or a blending tool to blend the colors together for a seamless effect.
- Stippling: Stippling involves creating a pattern of small dots or marks using the paint marker. This technique can add texture and depth to your artwork.
Experiment with these techniques to find your own unique style and create stunning artwork with paint markers.
Step 4: Layering Colors with Paint Markers
Layering colors with paint markers is a great way to add depth and dimension to your artwork. Here are some tips for layering colors effectively:
- Start with a light base color: Begin by applying a light base color to your surface. This will serve as the foundation for your artwork and provide a backdrop for the other colors.
- Build up darker shades: Once the base color is dry, layer on darker shades of paint to create shadows and depth. Start with lighter shades and gradually build up to darker shades for a more realistic effect.
- Blend colors together: Use a brush or a blending tool to blend the colors together. This will help create smooth transitions between colors and avoid harsh lines.
- Experiment with different techniques: Try different techniques, such as stippling or cross-hatching, to create interesting textures and effects.
Layering colors with paint markers allows you to create vibrant and dynamic artwork that captures the eye.
Step 5: Sealing Your Artwork
Sealing your artwork is an important step to protect it and ensure its longevity. Here’s how to seal your artwork created with paint markers:
- Allow the paint to dry completely: Before sealing your artwork, make sure that the paint is completely dry. This will prevent smudging or smearing when you apply the sealer.
- Choose a suitable sealer: There are various sealers available, such as varnishes or fixatives, that can be used to seal your artwork. Choose a sealer that is compatible with the surface you have used and provides the level of protection you desire.
- Apply the sealer evenly: Use a brush or a spray to apply the sealer evenly over your artwork. Make sure to cover all areas to ensure complete protection.
- Follow the manufacturer’s instructions: Different sealers may have different drying times and application methods. Follow the manufacturer’s instructions for the best results.
Sealing your artwork will protect it from dust, moisture, and UV damage, ensuring that it remains vibrant and intact for years to come.
Tips and Tricks for Paint Marker Beginners
Using paint markers can be a fun and rewarding experience. Here are some tips and tricks to help you get the most out of your paint markers:
- Shake the markers well before using them to ensure that the paint is mixed properly and flows smoothly.
- Test the markers on a scrap piece of paper or canvas before starting your main artwork to get a feel for the flow and consistency of the paint.
- Experiment with different techniques, such as stippling, blending, and layering, to create different effects and textures in your artwork.
- Clean the nibs of your markers regularly by wiping them with a damp cloth or paper towel. This will prevent the paint from drying and clogging the nib.
- Store your markers horizontally to prevent the paint from settling and the nibs from drying out.
These tips and tricks will help you become more confident and skilled in using paint markers.
How to Fix Mistakes
Making mistakes is a natural part of the creative process. Here are some tips for fixing mistakes when using paint markers:
- Act quickly: If you make a mistake, try to fix it as soon as possible before the paint dries. This will make it easier to remove or cover up the mistake.
- Use a clean cloth or paper towel to blot or wipe away the mistake. Be gentle and avoid scrubbing too hard, as this may damage the surface or spread the paint.
- If the mistake is small, you can try covering it up with a layer of paint in a similar color. Allow the paint to dry before adding additional layers or details.
- For larger mistakes, you may need to remove the paint completely and start over. Use a mild solvent or paint remover designed for the surface you are working on.
Remember, mistakes are an opportunity to learn and grow as an artist. Embrace them and use them as a chance to experiment and try new techniques.
Blending Colors Effectively
Blending colors with paint markers can create beautiful gradients and smooth transitions between shades. Here are some tips for blending colors effectively:
- Start with a light base color: Apply a light base color to your surface and allow it to dry completely. This will serve as the foundation for your blend.
- Choose colors that are close in tone: Select colors that are similar in tone and intensity for a smoother blend. Colors that are too different may create a harsh transition.
- Work quickly: Blend the colors while they are still wet to achieve a seamless blend. Use a brush or a blending tool to gently mix the colors together.
- Practice on a separate surface: Before blending on your main artwork, practice blending on a separate piece of paper or canvas to get a feel for the technique.
Blending colors with paint markers takes practice, so don’t be discouraged if your first attempts aren’t perfect. With time and practice, you’ll develop your own unique blending style.
Creative Projects to Start with Paint Markers
Paint markers offer endless possibilities for creative projects. Here are some ideas to get you started:
- Project Idea 1: Customizing Mugs: Use paint markers to create intricate designs and patterns on plain mugs. Personalize them with names, quotes, or images.
- Project Idea 2: Designing Your Own T-shirts: Use paint markers to create unique designs on plain t-shirts. Experiment with different colors and techniques to create one-of-a-kind wearable art.
- Project Idea 3: Creating Canvas Art: Use paint markers to create vibrant and bold artwork on canvas. Explore different themes and styles to express your creativity.
These projects are just a starting point. Let your imagination run wild and explore different surfaces and techniques to create your own unique artwork with paint markers.
Project Idea 1: Customizing Mugs
Customizing mugs with paint markers is a fun and easy DIY project. Here’s how to get started:
- Start with a clean ceramic mug: Make sure the surface of the mug is clean and free from any dust or grease. This will ensure that the paint adheres properly.
- Plan your design: Decide on the design you want to create. Sketch it out on paper first if you need to. You can create patterns, words, or images depending on your preference.
- Use paint markers to create your design: Carefully apply the paint markers to the mug, following your design. Take your time and be patient to ensure precision and neatness.
- Let the paint dry: Once you have completed your design, allow the paint to dry completely. This can take several hours or overnight, depending on the brand of paint markers you are using.
- Bake the mug: To make your design permanent, bake the mug in the oven according to the manufacturer’s instructions. This will help set the paint and make it dishwasher safe.
Customized mugs make great gifts or personal additions to your kitchen. Have fun experimenting with different designs and colors!
Project Idea 2: Designing Your Own T-shirts
Designing your own t-shirts with paint markers is a creative and unique way to express yourself. Here’s how you can do it:
- Start with a plain cotton t-shirt: Choose a plain t-shirt in a color of your choice. Make sure it is clean and has been pre-washed to remove any shrinkage.
- Plan your design: Decide on the design you want to create. Sketch it out on paper first if you need to. Consider the placement and size of your design on the t-shirt.
- Use fabric paint markers: Carefully apply the fabric paint markers to the t-shirt, following your design. Use light strokes and allow the paint to dry before adding additional layers or details.
- Heat set the design: To make your design permanent, heat set it according to the instructions provided with the fabric paint markers. This usually involves ironing the design or placing it in a dryer.
Designing your own t-shirts allows you to create unique and personalized clothing. Experiment with different colors and styles to create t-shirts that reflect your personality and creativity.
Project Idea 3: Creating Canvas Art
Creating canvas art with paint markers is a popular and versatile project. Here’s how you can get started:
- Choose a canvas: Select a canvas in a size that suits your design. Consider the surface texture and choose one that is suitable for use with paint markers.
- Plan your artwork: Decide on the theme or subject of your artwork. Sketch out your design on the canvas beforehand if needed.
- Use paint markers to create your artwork: Carefully apply the paint markers to the canvas, following your design. Experiment with different colors and techniques to create depth and texture.
- Let the paint dry: Allow the paint to dry completely before adding additional details or layers. This can take several hours or overnight, depending on the brand of paint markers you are using.
- Seal your artwork: Once your artwork is complete and dry, consider sealing it with a varnish or fixative to protect the paint and ensure its longevity.
Creating canvas art with paint markers allows you to explore your creativity and create unique and vibrant artwork. Let your imagination run wild and experiment with different styles and techniques.
Caring for Your Paint Markers
Taking care of your paint markers will ensure that they last longer and continue to perform well. Here’s how to care for your paint markers:
- Store them properly: Store your paint markers horizontally to prevent the paint from settling and the nibs from drying out. Keep them in a cool and dry place away from direct sunlight.
- Recap them after use: Always make sure to recap your paint markers after use to prevent the paint from drying out.
- Clean the nibs: Regularly clean the nibs of your paint markers by wiping them with a damp cloth or paper towel. This will help prevent clogging and ensure a smooth flow of paint.
Taking these simple steps will help extend the lifespan of your paint markers and keep them in good working condition.
Proper Storage of Paint Markers
Proper storage of paint markers is important to ensure their longevity and performance. Here are some tips for storing your paint markers:
- Store horizontally: Store your paint markers horizontally to prevent the paint from settling at the bottom of the marker and the nib from drying out. This will help ensure an even flow of paint.
- Keep away from direct sunlight: Exposure to direct sunlight can cause the paint to dry out and the colors to fade. Store your markers in a cool and dry place away from direct sunlight.
- Avoid extreme temperatures: Extreme temperatures can affect the quality of the paint and the performance of the markers. Avoid storing them in areas that are too hot or too cold.
- Recap after use: Always make sure to recap your paint markers after use to prevent the paint from drying out. This will help extend their lifespan and ensure they are ready for use next time.
By following these storage tips, you can prolong the life of your paint markers and ensure they are always in good working condition.
Cleaning Tips for Longevity
Proper cleaning and maintenance of your paint markers will help prolong their lifespan and ensure they continue to perform well. Here are some cleaning tips to keep in mind:
- Wipe the nibs: Regularly wipe the nibs of your paint markers with a damp cloth or paper towel to remove any dried paint or dirt. This will help prevent clogging and ensure a smooth flow of paint.
- Use a cleaning solution: If the nibs are clogged or the paint has dried on them, you can use a mild cleaning solution designed for the type of paint markers you are using. Follow the manufacturer’s instructions for best results.
- Store them properly: After cleaning, make sure to store your paint markers horizontally to prevent the paint from settling and the nibs from drying out.
By regularly cleaning and maintaining your paint markers, you can ensure that they continue to deliver vibrant and consistent performance.
Advanced Techniques for Seasoned Artists
For seasoned artists, paint markers offer a wide range of advanced techniques to explore and experiment with. Here are some advanced techniques you can try:
- Experimenting with Mixed Media: Combine paint markers with other art mediums, such as acrylic paint, watercolors, or colored pencils, to create unique and dynamic artwork.
- Techniques for Detailed Artwork: Use fine-tip paint markers to create intricate and detailed artwork. Explore techniques such as cross-hatching, stippling, and layering to add depth and texture.
By pushing the boundaries of what can be achieved with paint markers, seasoned artists can create stunning and innovative artwork.
Experimenting with Mixed Media
Combining paint markers with other art mediums opens up a world of creative possibilities. Here’s how you can experiment with mixed media:
- Acrylic Paint: Use paint markers in combination with acrylic paint to add details and highlights to your artwork. The opaque nature of the paint markers allows them to stand out against the acrylic background.
- Watercolors: Apply a layer of watercolor wash as a background and use paint markers to add intricate details and line work on top. The combination of the transparent watercolors and the opaque paint markers creates a beautiful contrast.
- Colored Pencils: Combine colored pencils with paint markers to add depth and texture to your artwork. Use colored pencils to blend and shade, and paint markers to add bold lines and highlights.
Experimenting with mixed media allows you to explore different textures, techniques, and effects in your artwork, resulting in unique and visually stunning pieces.
Techniques for Detailed Artwork
Paint markers with fine tips are perfect for creating detailed artwork. Here are some techniques to help you achieve intricate and precise details:
- Cross-hatching: Use fine lines drawn close together in a crisscross pattern to create shading and texture. Vary the density and direction of the lines to add depth and dimension.
- Stippling: Create patterns and textures by applying small dots or marks with the fine tip of the marker. Vary the size and density of the dots to achieve different effects.
- Layering: Build up layers of colors using fine lines and strokes to create depth and dimension. Start with lighter colors and gradually add darker shades to create realistic shadows and highlights.
- Blending: Use a blending tool or a brush to blend colors together smoothly. Layer different colors on top of each other and blend them together to create smooth transitions.
By using these techniques and experimenting with different styles, you can create intricate and detailed artwork that captures the attention of viewers.
Conclusion
In conclusion, mastering the art of paint markers opens up a world of creativity and self-expression. Understanding the basics, from types and techniques to caring for your supplies, is crucial for unleashing your artistic potential. Dive into projects like customizing mugs or designing t-shirts to bring your ideas to life. Remember to explore advanced techniques and troubleshoot common issues for a seamless painting experience. Whether you’re a beginner or a seasoned artist, paint markers offer endless possibilities for creating vibrant and personalized artwork. Let your imagination flow through every stroke and color choice, turning your creations into masterpieces.
Frequently Asked Questions
-
Can Paint Markers Be Used on Any Surface?
Paint markers can be used on a variety of surfaces, including paper, canvas, wood, glass, plastic, metal, and even ceramics. However, it’s important to choose the right type of paint marker for the surface you are working on. Acrylic paint markers are generally versatile and can be used on a wide range of materials. -
How Long Do Paint Markers Take to Dry?
The drying time of paint markers can vary depending on factors such as the brand, the surface, and the thickness of the application. In general, paint markers dry relatively quickly, usually within a few minutes to a couple of hours. It’s always best to follow the manufacturer’s instructions for specific drying times. -
Are Paint Markers Waterproof?
Many paint markers are waterproof or water-resistant once they are dry. This means that the paint will not smudge or wash away when exposed to water. However, it’s important to check the specific product description or label to determine if the paint marker you are using is waterproof or water-resistant. -
Can You Refill Paint Markers?
Some paint markers are designed to be refillable, allowing you to easily replace the ink and extend the life of the marker. Refillable paint markers typically have a refillable chamber or cartridge that can be filled with paint or ink. Check the manufacturer’s instructions or product description to determine if your paint marker is refillable. -
How to Remove Paint Marker from Different Surfaces?
Removing paint marker from different surfaces can be challenging, as paint markers are designed to adhere to various materials. The best method for removal depends on the surface and the type of paint marker used. Some common methods include using rubbing alcohol, acetone, or specialized paint marker removers. It’s important to test the removal method in a small, inconspicuous area first to ensure it does not damage the surface. -
Are Paint Markers Safe for Children?
Paint markers are generally safe for children to use, but it’s important to supervise them during the creative process. Some paint markers may contain chemicals that could be harmful if ingested or if the ink comes into contact with eyes or skin. Always check the product label and follow the manufacturer’s safety instructions when using paint markers with children.