Key Highlights
- Paint markers are versatile instruments that perform admirably on a range of materials, such as glass, metal, and wood.
- They are available in several forms, such as liquid paint and opaque markers, each with special qualities and uses.
- It is critical to choose the appropriate paint marker type for your project if you want the desired outcomes.
- You may create more artistic freedom with varying line widths and effects by using different tips, such fine, medium, and broad.
- The composition of the ink should also be taken into account; water-based and oil-based markers, for example, have various benefits.
- To pick the best brand for your needs, consider variables like quality, value, and color selection while comparing companies.
- Key Highlights
- Introduction
- Exploring the Vibrant Universe of Paint Markers
- 1. Selecting the Right Type of Paint Marker for Your Project
- 2. Understanding the Different Tips: Fine, Medium, and Broad
- 3. The Importance of Ink Composition: Oil-Based vs. Water-Based
- 4. Brand Comparisons: Finding the Best Quality and Value
- 5. Color Selection Tips: Building a Versatile Palette
- 6. Techniques for Blending and Layering Colors
- 7. Surface Preparation: Ensuring Long-Lasting Artwork
- 8. Creating Texture and Depth with Special Effects
- 9. Tips for Fixing Mistakes and Cleanup
- 10. Storage and Maintenance of Paint Markers
- Enhancing Your Artistry: Advanced Paint Marker Techniques
- Inspirational Projects to Unleash Your Creativity
- Conclusion
- Frequently Asked Questions
Introduction
Paint markers are increasingly favored by artists, crafters, and DIY enthusiasts for their versatility and user-friendly nature. These markers, containing opaque paint, deliver bright, enduring colors that adhere well to a variety of surfaces like glass, metal, and wood. Whether you are a seasoned artist aiming to enrich your creations or a novice eager to experiment, paint markers can expand your artistic horizons.
There are various types of paint markers, each with distinct characteristics and uses. Opaque paint markers, also called solid paint markers, provide great coverage and are excellent for making vivid, striking designs. Conversely, liquid paint markers offer a smoother application, making them perfect for intricate details. Both types come in a wide array of colors, including metallic and fluorescent shades, allowing artists to produce captivating artwork.
I try in this article to explore the fascinating world of paint markers and provide tips and tricks to improve your artistic abilities. I will cover every important detail, from selecting the ideal paint marker for your project to comprehending various tips and ink compositions. In order to spark your creativity, I will also compare brands, offer color suggestions, examine cutting-edge methods, and present motivational projects. I hope you will enjoy coming with me as I explore the world of paint markers and discover all the endless possibilities they provide.
Exploring the Vibrant Universe of Paint Markers
Paint markers, also known as paint pens or paint pens, are an essential tool for artists, crafters, and DIY enthusiasts. They offer the convenience of a marker with the vibrancy and coverage of paint. Paint markers are filled with high-quality, opaque paint that can be applied to a wide range of surfaces, including paper, canvas, wood, glass, metal, and more. Whether you’re creating detailed illustrations, adding accents to mixed media projects, or customizing home decor items, paint markers are a versatile and essential addition to any artist’s toolbox. With their vibrant colors, smooth application, and quick-drying properties, paint markers are the go-to choice for many artists and crafters alike.
1. Selecting the Right Type of Paint Marker for Your Project
When it comes to paint markers, there are different types to choose from, each offering unique features and applications. Here are some factors to consider when selecting the right type of paint marker for your project:
- Opaque paint markers: These markers provide excellent coverage and are perfect for creating bold, vibrant designs. They are ideal for adding details and highlights to your artwork.
- Liquid paint markers: These markers offer a smoother and more fluid application, making them ideal for detailed work and intricate designs. They are perfect for creating fine lines and adding delicate details to your artwork.
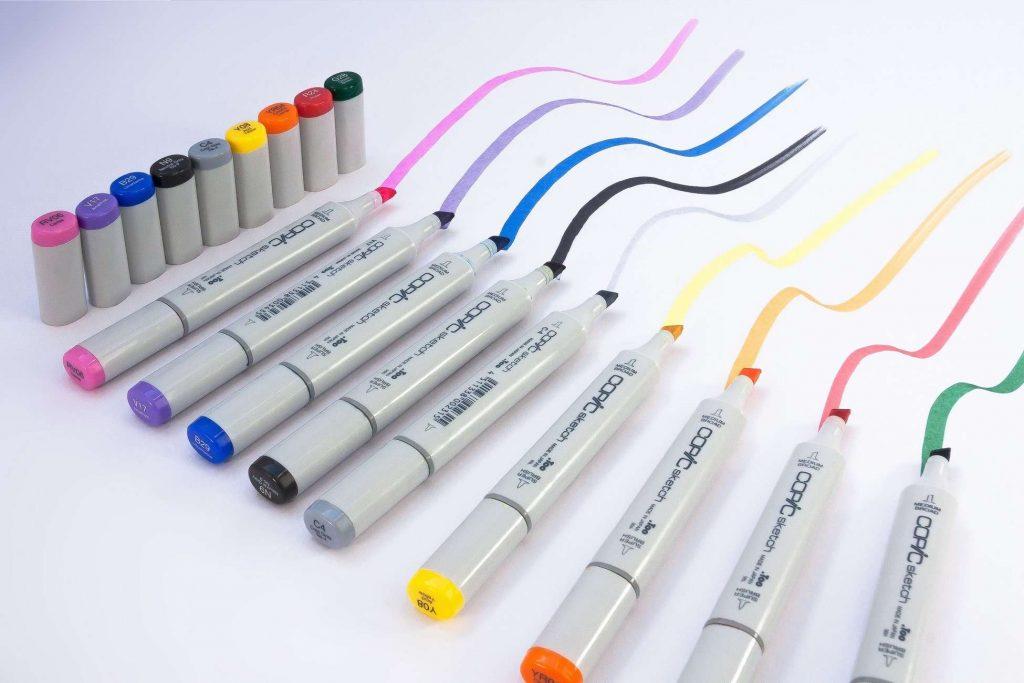
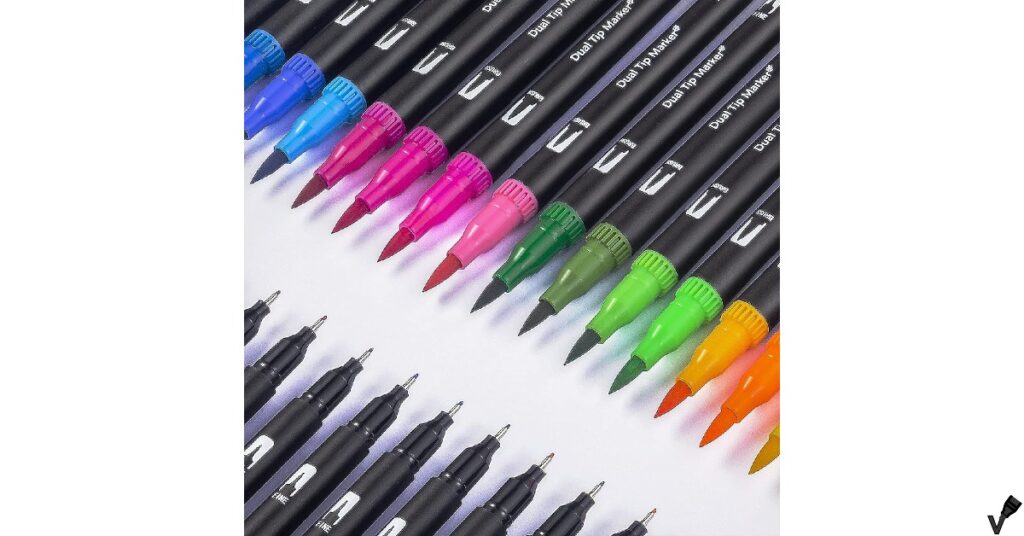
- Dual-tip paint markers: These markers offer versatility with both a fine point and a broad chisel tip like the Zebra Pen Mildliner Double Ended Highlighter. They are great for creating varying line widths and adding different effects to your artwork.
- Solid paint markers: These markers are designed for industrial applications and offer high durability and long-lasting results. They are perfect for outdoor use and can withstand harsh weather conditions.
By considering the specific requirements of your project and the desired effects you want to achieve, you can select the right type of paint marker that best suits your needs.
2. Understanding the Different Tips: Fine, Medium, and Broad
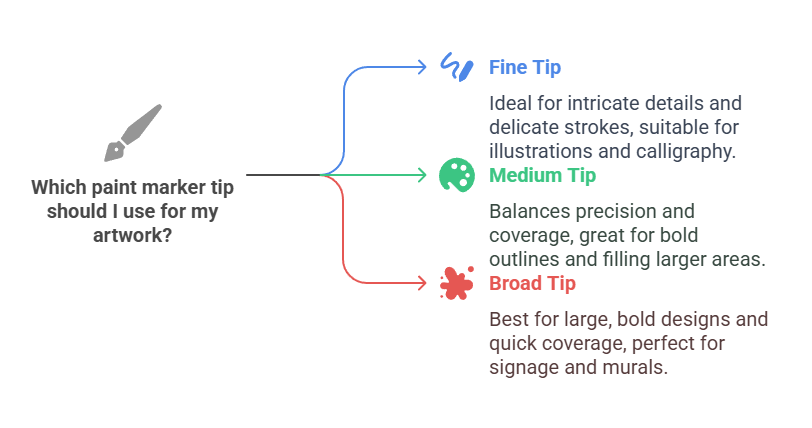
Paint markers come with different tip options, such as fine, medium, and broad, each offering its own unique characteristics and applications. Here’s a breakdown of the different tip options and their uses:
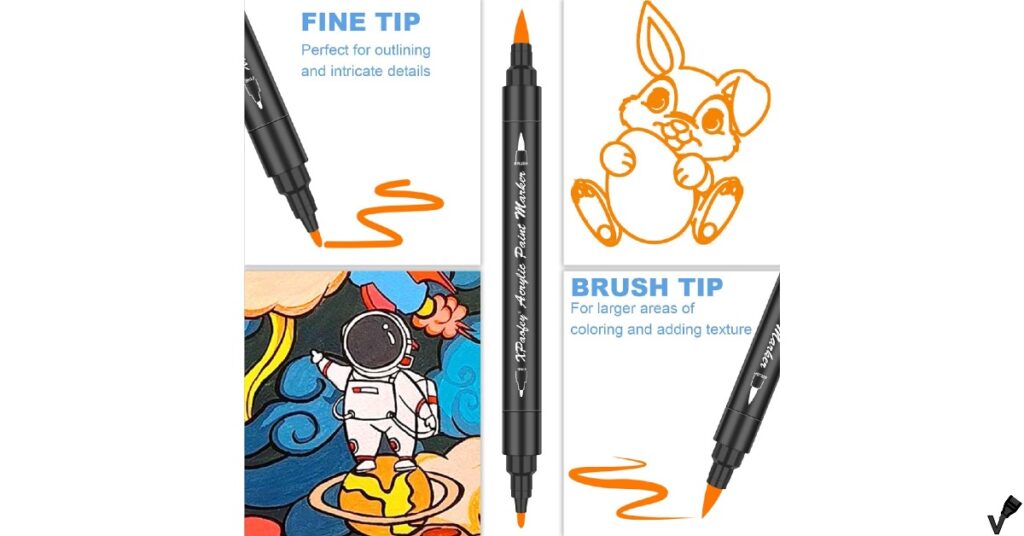
- Fine tip: A fine tip paint marker is perfect for creating precise lines and small details in your artwork. It allows for intricate designs and delicate brush-like strokes. This tip is ideal for adding fine details to illustrations, calligraphy, and other intricate designs.
- Medium tip: A medium tip paint marker offers a balance between precision and coverage. It is versatile enough to create both thin and thicker lines, making it suitable for a wide range of applications. This tip is great for filling in larger areas and adding bold outlines to your artwork.
- Broad tip: A broad tip paint marker provides excellent coverage and is ideal for creating large, bold designs. It allows for quick, broad strokes and is great for filling in large areas with solid color. This tip is perfect for creating eye-catching signage, posters, and murals.
When choosing a paint marker, consider the type of artwork you’ll be creating and the level of detail you want to achieve. Having a variety of tip sizes in your collection will give you greater flexibility and allow you to create different effects in your artwork. A lot of markers offer two tips at the same time, for example the ZSCM Duo Tip Paint Markers comes with a fineliner and a brush tip, which is not that common.
3. The Importance of Ink Composition: Oil-Based vs. Water-Based
The ink composition of paint markers is an important factor to consider when selecting the right one for your project. There are two main types of ink compositions: oil-based and water-based. Here’s a breakdown of their characteristics and uses:
- Oil-based paint markers: Oil-based markers are known for their vibrant colors, high opacity, and excellent coverage. They are ideal for creating bold, long-lasting designs on various surfaces, including metal, glass, and plastic. Oil-based markers are also suitable for outdoor use as they are weather-resistant and can withstand harsh weather conditions. However, they do require proper ventilation when used indoors due to their strong odor.
- Water-based paint markers: Water-based markers are a popular choice among artists as they offer a wide range of colors, fast-drying properties, and easy cleanup. They are perfect for creating detailed artwork, illustrations, and calligraphy. Water-based markers are also non-toxic and have a lower odor, making them safe to use in indoor spaces. However, they may not be as durable on certain surfaces and may require additional sealing or protection to prevent smudging or fading.
Consider the specific requirements of your project and the surface you’ll be working on when choosing between oil-based and water-based paint markers. Both options have their own unique advantages and can produce stunning results.
4. Brand Comparisons: Finding the Best Quality and Value
When it comes to paint markers, there are various brands available, each offering its own unique features and qualities. Here’s a comparison of some popular paint marker brands:
| Brand | Features | Colors Available |
| Posca | Water-based, opaque paint | Wide range of vibrant colors |
| Sakura | Water-based, metallic paint | Metallic and shimmering colors |
| Kuretake | Water-based, dual-tip | Wide range of colors |
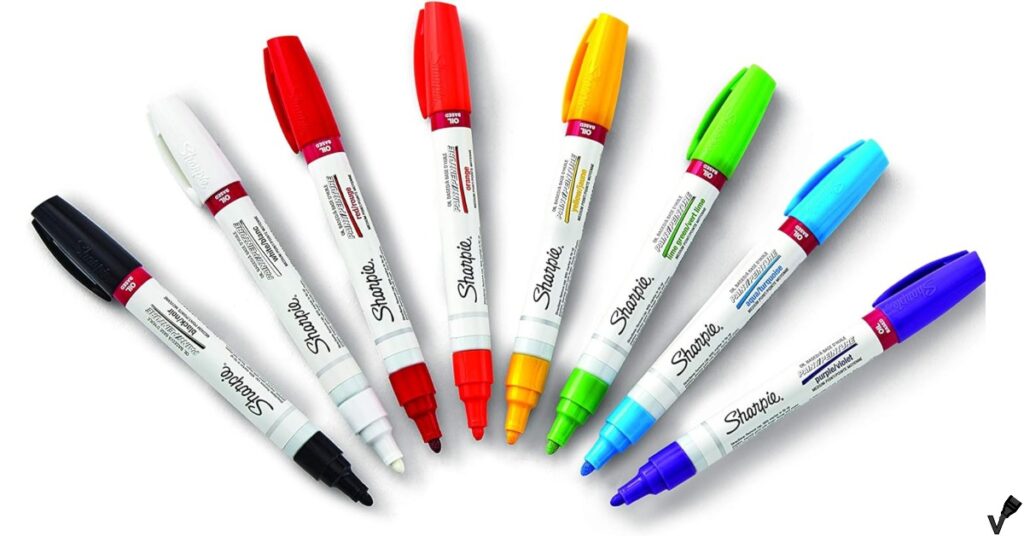
| Sharpie | Oil-based, quick-drying | Bold, vibrant colors |
| Marvy | Water-based, chisel tip | Wide range of colors |
| Molotow | Acrylic-based, refillable | Wide range of sizes and colors |
| Pebeo | Acrylic-based, fine tip | Metallic and fluorescent colors |
When choosing a brand, consider factors such as the type of paint marker, the variety of colors available, the quality of the ink, and the overall value for your money. It’s also helpful to read reviews and seek recommendations from other artists to find the best brand that suits your needs and preferences.
Here is a video from Hop-A-Long Studio explaining how to choose inexpensive paint markers depending on your project:
5. Color Selection Tips: Building a Versatile Palette
The color selection is an important aspect of using paint markers as it can greatly impact the overall look and feel of your artwork. Here are some tips to help you build a versatile color palette:
- Start with primary colors: Begin with a basic set of primary colors, including red, blue, and yellow. These colors can be mixed to create a wide range of secondary colors, giving you more options for your artwork.
- Experiment with different shades and hues: Add variety to your color palette by including different shades and hues of each primary color. This will allow you to create depth and dimension in your artwork.
- Consider metallic and fluorescent colors: Metallic and fluorescent colors can add a touch of shine and vibrancy to your artwork. Experiment with these colors to create eye-catching effects and highlights.
- Choose colors that complement each other: Consider the color wheel and select colors that are complementary or harmonious. This will help create a visually appealing color scheme and ensure that your artwork is cohesive.
- Don’t be afraid to mix and blend: Paint markers are great for mixing and blending colors. Experiment with different color combinations to create unique shades and tones that are specific to your artwork.
By following these color selection tips, you can build a versatile palette that allows you to create a wide range of artwork and express your creativity.
6. Techniques for Blending and Layering Colors
Blending and layering colors with paint markers can add depth and dimension to your artwork. Here are some techniques to help you achieve beautiful blended and layered effects:
- Wet-on-wet: Apply one color to the surface and while it’s still wet, add another color directly on top. Use a brush or blending tool to gently blend the colors together. This technique creates smooth transitions and gradients.
- Dry brushing: Apply a small amount of paint to the tip of the marker and lightly brush it across the surface. This technique allows you to create texture and add highlights to your artwork.
- Layering: Apply one color to the surface and let it dry completely. Then, layer another color on top to create depth and richness. This technique works well for creating highlights and shadows.
- Stippling: Use the tip of the marker to create small dots or stippling on the surface. This technique creates texture and can be used to add details or create interesting patterns.
- Smudging: Apply one color to the surface and use a blending tool or your finger to smudge or blend the color. This technique creates a soft, blended effect.
Experiment with these techniques and find the ones that work best for your style and desired effects. Don’t be afraid to mix and match colors and techniques to create unique and stunning artwork.
7. Surface Preparation: Ensuring Long-Lasting Artwork
Proper surface preparation is important when using paint markers to ensure that your artwork lasts and adheres well to the surface. Here are some tips for preparing different surfaces:
- Paper: Choose a paper that is thick and smooth to prevent bleeding and feathering. If the paper is porous, consider using a primer or sealant to create a smoother surface for the paint.
- Canvas: Apply a layer of gesso to the canvas before using paint markers. This will provide a better surface for the paint to adhere to and prevent the colors from bleeding.
- Glass: Clean the glass surface thoroughly before applying the paint markers. Use a glass cleaner to remove any dirt or grease that may inhibit the adhesion of the paint.
- Metal: Sand the metal surface lightly to create a rougher texture that will help the paint adhere better. Clean the surface with a degreaser to remove any oils or residue.
- Wood: Sand the wood surface to create a smooth and even surface. Apply a layer of primer or sealant before using the paint markers to prevent bleeding and ensure better adhesion.
By properly preparing the surface before using paint markers, you can ensure that your artwork lasts longer and looks its best.
8. Creating Texture and Depth with Special Effects
Paint markers can be used to create texture and depth in your artwork. Here are some special effects techniques you can try:
- Splatter effect: Load the brush or nib of the paint marker with paint and flick it gently over the surface to create a splatter effect. This technique adds texture and movement to your artwork.
- Dry brush technique: Apply a small amount of paint to the brush or nib of the paint marker and lightly brush it across the surface. This technique creates a dry, textured effect.
- Dotting technique: Use the tip of the paint marker to create dots or stippling on the surface. Vary the size and spacing of the dots to create texture and interest.
- Sgraffito technique: Apply a layer of paint to the surface and let it dry. Then, use a sharp tool to scratch or scrape designs into the dried paint. This technique creates texture and adds dimension to your artwork.
These special effects techniques can be used to enhance your artwork and make it more visually interesting. Experiment with different techniques and find the ones that work best for your style and desired effects.
9. Tips for Fixing Mistakes and Cleanup
Making mistakes is a natural part of the creative process, but fortunately, paint markers offer some easy ways to fix them. Here are some tips for fixing mistakes and cleaning up:
- Quick corrections: If you make a mistake, act quickly. Use a paper towel or cotton swab to blot or wipe away the wet paint. If the paint has dried, try using an eraser or a scratch tool to remove the unwanted marks.
- Layering: If you can’t completely remove a mistake, consider layering over it with a new color. This can help camouflage the mistake and create a new design element.
- Solvent-based markers: If you’re using solvent-based markers, such as oil-based paint markers, you can use a solvent like turpentine or mineral spirits to clean your tools and remove unwanted marks. Be sure to work in a well-ventilated area and follow the manufacturer’s instructions.
- Water-based markers: For water-based markers, cleanup is as simple as washing your tools and surfaces with soap and water. These markers are easy to clean and maintain.
By following these tips, you can fix mistakes and keep your paint markers and artwork looking their best.
10. Storage and Maintenance of Paint Markers
Proper storage and maintenance of paint markers can help prolong their life and ensure that they continue to perform well. Here are some tips for storing and maintaining your paint markers:
- Store markers horizontally: Storing markers horizontally can help prevent the ink from settling at the tip and drying out. It also helps maintain consistent ink flow.
- Recap tightly: Make sure to recap the markers tightly after use to prevent the ink from drying out. This is especially important for markers with a brush or nib tip.
- Clean tips regularly: Clean the tips of your markers regularly to prevent clogging and maintain good ink flow. Use a paper towel or cloth to gently wipe away any excess paint.
- Replace tips if necessary: If the tips of your markers become worn or damaged, consider replacing them. Many paint marker brands offer replacement tips, which can extend the life of your markers.
By following these storage and maintenance tips, you can ensure that your paint markers are always ready to use and perform at their best.
Enhancing Your Artistry: Advanced Paint Marker Techniques
Once you’ve mastered the basics of using paint markers, you can explore more advanced techniques to enhance your artistry. Here are some techniques to take your paint marker artwork to the next level:
- Mastering fine lines and detailed work: Practice using a fine tip paint marker to create intricate and detailed designs. Experiment with different pressures and strokes to achieve different effects.
- Exploring mixed media applications: Combine paint markers with other art mediums such as acrylic paints, colored pencils, or pastels to create unique mixed media artwork with contrasting textures and colors.
- Innovative uses in DIY projects and home decor: Use paint markers to customize everyday items such as mugs, shoes, or vases. Explore different surfaces and experiment with different color combinations to create one-of-a-kind pieces.
- Incorporating paint markers into traditional art forms: Explore how paint markers can be used in traditional art forms such as calligraphy or painting on canvas. Experiment with different techniques to create unique and expressive artwork.
By exploring these advanced techniques, you can push the boundaries of your creativity and create artwork that truly stands out.
1. Mastering Fine Lines and Detailed Work
Mastering fine lines and detailed work with paint markers requires practice and control. Here are some tips to help you achieve precise and intricate designs:
- Use a fine tip paint marker: Fine tip paint markers are perfect for creating fine lines and small details. Practice using the marker with different pressures to achieve different line widths.
- Slow and steady strokes: Take your time and use slow and steady strokes when creating fine lines and details. This will help you maintain control and accuracy.
- Experiment with line weights: Vary the pressure you apply to the marker to create lines of different thicknesses. This can add depth and dimension to your artwork.
- Work in layers: Build up your design in layers, starting with the lightest colors and gradually adding darker shades. This will help you achieve a smooth and detailed finish.
- Practice hand-eye coordination: Fine lines and detailed work require good hand-eye coordination. Practice drawing straight lines and small shapes to improve your control.
With practice and patience, you can master the art of creating fine lines and intricate details with paint markers.
2. Exploring Mixed Media Applications
Paint markers can be used in combination with other art mediums to create unique mixed media artwork. Here are some ideas for incorporating paint markers into your mixed media projects:
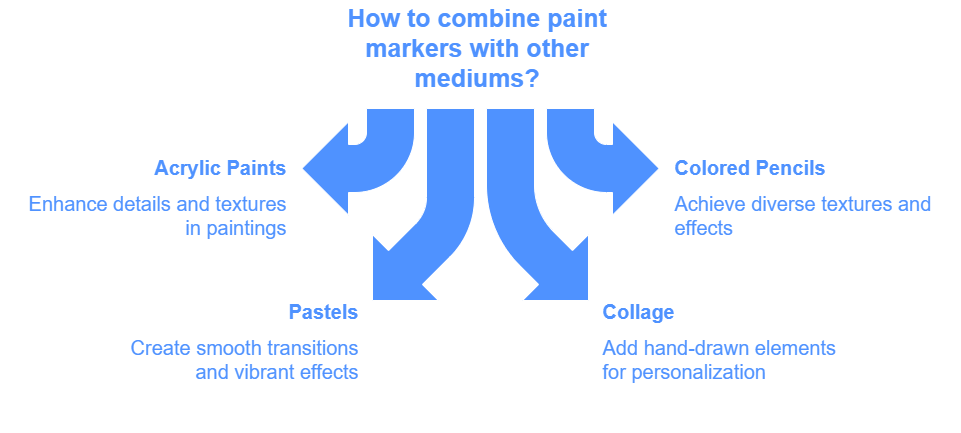
- Acrylic paints: Combine paint markers with acrylic paints to add details and highlights to your paintings. Use the markers to enhance specific areas or add fine lines and textures.
- Colored pencils: Use paint markers to create a base layer of color and add details with colored pencils. This combination allows you to achieve a wide range of textures and effects.
- Pastels: Experiment with layering paint markers and pastels to create rich and vibrant effects. Use the paint markers as a base and blend pastels on top to create smooth transitions.
- Collage: Incorporate paint markers into your collage work by adding hand-drawn elements or outlining cutouts. This can add a personalized touch and create visual interest.
By exploring mixed media applications, you can combine different art mediums to create unique and visually stunning artwork.
3. Innovative Uses in DIY Projects and Home Decor
Paint markers offer endless possibilities for DIY projects and home decor. Here are some innovative ways to use paint markers:
- Personalizing everyday items: Use paint markers to customize mugs, shoes, phone cases, or other everyday items. Create unique designs or add personalized messages to make them truly one-of-a-kind.
- Transforming spaces with wall art and murals: Use paint markers to create wall art or murals in your home or office. Paint markers offer precise control and vibrant colors, making them perfect for creating large-scale artwork.
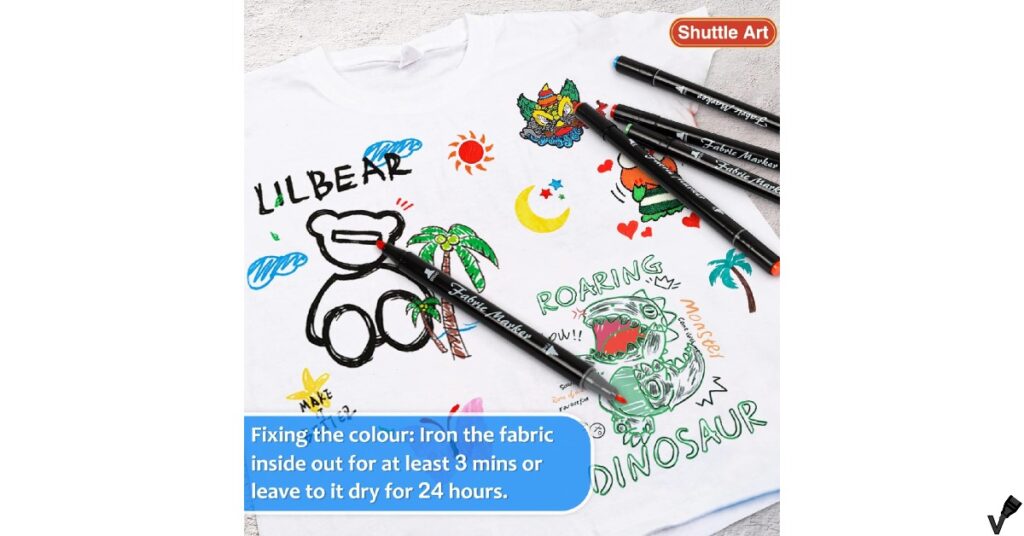
- Customizing textiles and fabrics: Use paint markers to create customized designs on textiles and fabrics. Whether it’s adding patterns to clothing or personalizing tote bags, paint markers offer a convenient and versatile option.
- Crafting unique gifts and keepsakes: Use paint markers to create personalized gifts or keepsakes for friends and family. Whether it’s a hand-painted ornament or a customized picture frame, paint markers allow you to add a personal touch to your creations.
By exploring these innovative uses, you can add a touch of creativity and uniqueness to your DIY projects and home decor.
4. Incorporating Paint Markers into Traditional Art Forms
Paint markers can be used to enhance traditional art forms and add a modern twist to your artwork. Here are some ways to incorporate paint markers into traditional art forms:
- Traditional art: Use paint markers to add details, highlights, or outlines to your paintings or drawings. This can add depth and dimension to your artwork.
- Calligraphy: Experiment with different brush tips and colors to create unique calligraphy designs. Paint markers offer precision and control, making them perfect for calligraphy work.
- Canvas painting: Combine paint markers with acrylic paints to create stunning canvas paintings. Use the markers for detailed work or to add vibrant accents to your artwork.
- Illustration: Use paint markers to add details, shading, or textures to your illustrations. The opaque and vibrant colors of paint markers can make your illustrations stand out.
By incorporating paint markers into traditional art forms, you can explore new techniques and create artwork that combines the best of both traditional and modern art.
Inspirational Projects to Unleash Your Creativity
Paint markers offer endless creative possibilities. Here are some inspirational projects to unleash your creativity:
- Personalizing everyday items: Customize mugs, shoes, or phone cases with unique designs or personalized messages.
- Transforming spaces with wall art and murals: Create large-scale artwork on walls or create murals that reflect your style and personality.
- Customizing textiles and fabrics: Add patterns or personal touches to clothing, tote bags, or pillowcases.
- Crafting unique gifts and keepsakes: Create personalized gifts or keepsakes for friends and family, such as hand-painted ornaments or customized picture frames.
You can see in the popular video below, Moriah Elizabeth showing 3 ideas she cames up with for using Posca Paint Pens:
By exploring these inspirational projects, you can let your creativity soar and create artwork that is truly unique and meaningful.
1. Personalizing Everyday Items: Mugs, Shoes, and More
Paint markers offer a fun and easy way to personalize everyday items. Here are some ideas for personalizing items using paint markers:
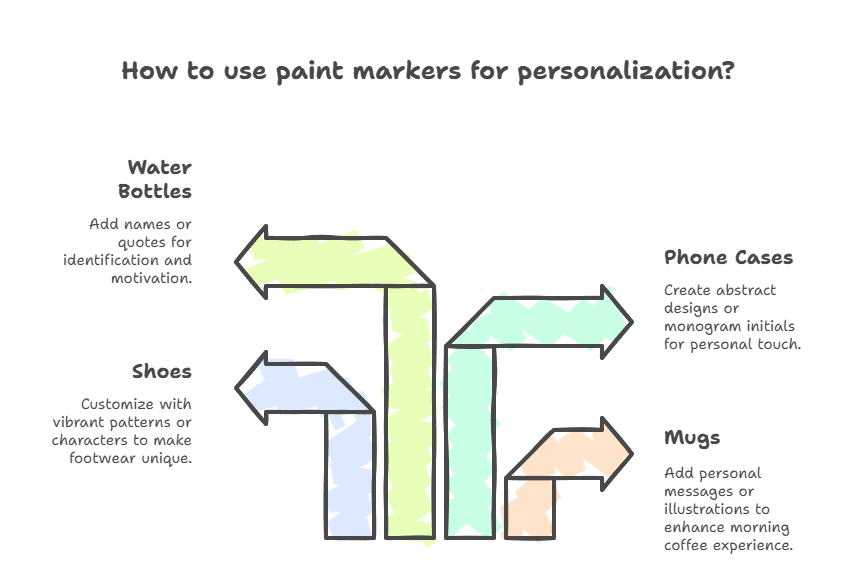
- Mugs: Use paint markers to create unique designs or add personalized messages to mugs. Whether it’s a favorite quote, a hand-drawn illustration, or a name, paint markers allow you to add a personal touch to your morning coffee.
- Shoes: Customize your plain sneakers or canvas shoes with paint markers. Add vibrant patterns, intricate designs, or your favorite characters to make your shoes stand out.
- Phone cases: Use paint markers to create unique designs or add personalized touches to your phone case. From abstract patterns to monogram initials, paint markers offer a convenient and creative way to customize your phone case.
- Water bottles: Add your name, favorite quotes, or motivational messages to your water bottle using paint markers. This not only adds a personal touch but also makes it easy to identify your bottle.
By personalizing everyday items with paint markers, you can let your creativity shine and create functional art pieces that reflect your style and personality.
2. Transforming Spaces with Wall Art and Murals
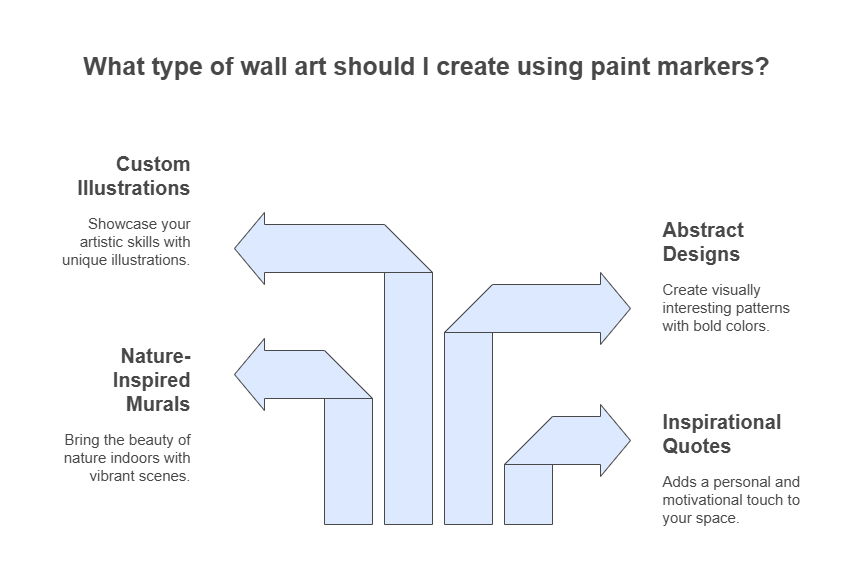
Paint markers are a great tool for transforming spaces and adding personality to your walls. Here are some ideas for using paint markers to create wall art and murals:
- Inspirational quotes: Write your favorite quotes or motivational messages on your walls using paint markers. This can serve as a daily reminder and add a personal touch to your space.
- Nature-inspired murals: Create scenic landscapes or nature-inspired murals on your walls using paint markers. From colorful flowers to serene seascapes, paint markers allow you to bring the beauty of nature indoors.
- Abstract designs: Use paint markers to create abstract designs or geometric patterns on your walls. Experiment with different colors and shapes to create a visually interesting and unique mural.
- Custom illustrations: Create custom illustrations on your walls using paint markers. Whether it’s a favorite character, a hand-drawn portrait, or a whimsical scene, paint markers offer precise control and vibrant colors for your artwork.
By using paint markers to create wall art and murals, you can transform your space into a personalized and visually stunning environment.
3. Customizing Textiles and Fabrics
Paint markers offer a convenient and versatile option for customizing textiles and fabrics. Here are some ideas for using paint markers to create unique designs:
- Customize plain t-shirts, jeans, or jackets with paint markers. Add patterns, illustrations, or quotes to make your clothing truly one-of-a-kind.
- Canvas shoes: Customize canvas shoes with paint markers by adding vibrant designs, intricate patterns, or your favorite characters. This allows you to create a pair of shoes that reflects your style and personality.
- Tote bags: Personalize tote bags with paint markers by adding your name, favorite quotes, or hand-drawn illustrations. This not only adds a personal touch but also makes your tote bag stand out.
- Pillowcases: Create custom designs on pillowcases using paint markers. Add patterns, monograms, or whimsical illustrations to make your pillowcases unique.

By using paint markers to customize textiles and fabrics, you can create wearable art pieces that showcase your creativity and individuality.
4. Crafting Unique Gifts and Keepsakes
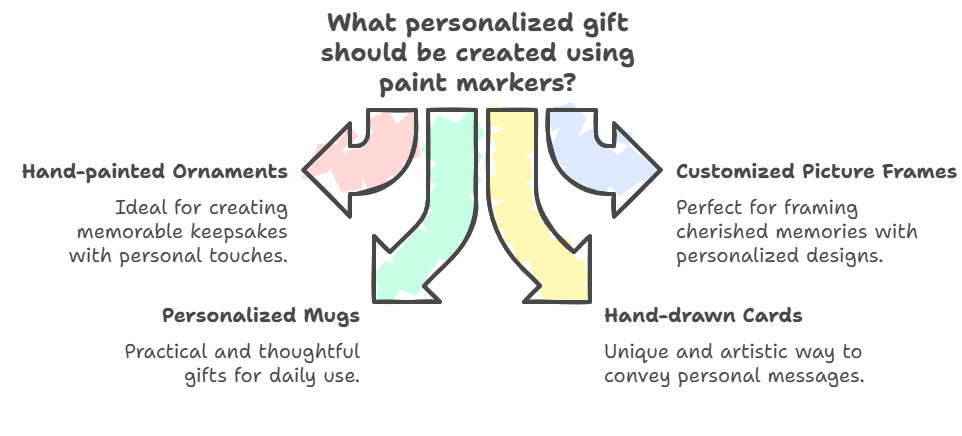
Paint markers offer a fun and creative way to craft unique gifts and keepsakes for your loved ones. Here are some ideas for using paint markers to create personalized gifts:
- Hand-painted ornaments: Create personalized ornaments by using paint markers to add names, dates, or hand-drawn illustrations. These make great gifts for special occasions or as keepsakes.
- Customized picture frames: Use paint markers to decorate picture frames with personalized designs, quotes, or hand-drawn illustrations. This adds a personal touch to the frame and makes it a unique gift.
- Personalized mugs: Customize mugs with paint markers by adding names, favorite quotes, or special messages. These personalized mugs make thoughtful and practical gifts for friends and family.
- Hand-drawn cards: Create one-of-a-kind cards by using paint markers to hand-draw designs, illustrations, or personalized messages. These unique cards are sure to make a lasting impression.
By using paint markers to craft unique gifts and keepsakes, you can show your loved ones how much you care with a personalized and heartfelt gift.
Conclusion
In the vibrant world of paint markers, mastering techniques and selecting the right tools are key to unleashing your creativity. From choosing the perfect marker type to creating texture and depth, every step contributes to your artwork’s longevity and beauty. Whether you’re exploring mixed media applications or customizing textiles, paint markers offer endless possibilities for DIY projects and home décor. Remember, practice makes perfect, and with a bit of innovation, you can transform everyday items into personalized works of art. So, dive in, experiment, and let your artistic journey flourish!
Frequently Asked Questions
-
What Surfaces Can I Use Paint Markers On?
Paint markers can be used on various surfaces, including ceramic, cardboard, metal, glass, wood, and more. They offer excellent adhesion and coverage on both porous and non-porous surfaces, making them versatile and suitable for various art and craft projects. -
How Do I Prevent My Paint Markers from Drying Out?
To prevent your paint markers from drying out, make sure to cap them tightly after each use. Storing them horizontally can also help prevent the ink from settling at the tip. If the marker has already dried out, you can try soaking the tip in water or cleaning it with a solvent. -
Can Paint Markers Be Used Outdoors?
Yes, many paint markers are suitable for outdoor use. However, it’s important to check the specific product details to ensure that the markers are weather-resistant and UV-resistant. Some markers may require additional sealing or protection to withstand outdoor conditions. -
Are Paint Markers Safe for Children’s Use?
Many paint markers are non-toxic and safe for children to use. However, it’s always important to check the specific product information and follow the manufacturer’s guidelines. Supervision and proper ventilation are recommended, especially when using markers with strong odors or solvent-based inks. -
How Long Do Paint Marker Creations Last?
The longevity of paint marker creations depends on various factors, including the surface, the quality of the markers, and the environmental conditions. Paint markers are generally fade-resistant and durable, ensuring that your artwork lasts for a long time with proper care and handling. -
Can I Mix Paint Marker Brands in a Single Project?
Yes, you can mix paint marker brands in a single project. However, it’s important to test the compatibility and consistency of the colors before using them together. Some brands may have slightly different ink compositions or drying times, so it’s always a good idea to test them on a small area first. -
What Is the Best Way to Seal Paint Marker Art?
To seal and protect your paint marker art, using a varnish or sealer is recommended. Apply a thin, even coat of varnish over your artwork once it’s completely dry. This will help protect it from moisture, UV rays, and other environmental factors that can cause fading or damage. Choose a varnish that is compatible with the type of paint markers you used, whether it’s acrylic, oil-based, or water-based. -
How Do I Remove Paint Marker Ink from Unwanted Areas?
If you make a mistake or need to remove paint marker ink from unwanted areas, there are a few methods you can try. One option is to use a solvent or cleaner specifically designed for the type of paint marker you used. Apply the solvent to a clean cloth or cotton swab and gently rub the ink until it starts to come off. Another option is to use isopropyl alcohol or nail polish remover, but be sure to test it on a small, inconspicuous area first to ensure it won’t damage the surface. -
Are There Eco-Friendly Paint Marker Options?
Yes, there are eco-friendly paint marker options available. Look for markers that are labeled as non-toxic and made with sustainable materials. These markers are typically water-based or use environmentally friendly solvents. They are safer to use and produce less harm to the environment compared to markers that contain harmful chemicals or are made from non-sustainable materials. Additionally, some brands offer refillable options, reducing the amount of plastic waste generated. -
Can You Refill Paint Markers?
Yes, many paint markers are refillable, making them a cost-effective and eco-conscious choice. Refilling markers not only saves money in the long run but also reduces plastic waste. Simply purchase a refill ink or paint and follow the instructions provided by the manufacturer to refill your markers. This way, you can keep using your favorite markers without having to buy new ones every time they run out. -
What’s the Difference Between Permanent and Non-Permanent Paint Markers?
The main difference between permanent and non-permanent paint markers is their level of washability. Permanent markers, as the name suggests, are designed to be permanent and resistant to water and fading. They are ideal for outdoor use or when you want your artwork to be long-lasting. Non-permanent or washable markers, on the other hand, can be easily washed off with water, making them more suitable for temporary or less permanent applications. -
How Do I Choose Between Matte and Glossy Finishes?
Choosing between a matte or glossy finish for your paint marker artwork depends on your personal preference and the desired effect. A matte finish has a more subtle and matte appearance, with no shine or reflection. It is great for creating a more understated or natural look. On the other hand, a glossy finish has a shiny and reflective surface, which can enhance colors and make them appear more vibrant. It gives a polished and professional look to your artwork. -
Tips for Working with Metallic and Glitter Paint Markers
Working with metallic and glitter paint markers can add a touch of sparkle and shine to your artwork. Here are a few tips to keep in mind: Shake the marker well before use to ensure the metallic or glitter particles are mixed properly. Test the marker on a scrap piece of paper before using it on your artwork to get a feel for how the color and shine will appear. Apply multiple thin layers of metallic or glitter ink to achieve a more intense and even coverage. Allow each layer to dry completely before applying the next to avoid smudging or smearing. Work in a well-ventilated area as some metallic and glitter markers may have a stronger odor than regular markers. -
Advice for Beginners Starting with Paint Markers
If you’re new to using paint markers, here are a few tips to help you get started: Start with a variety of basic colors to experiment and get a feel for the markers. Practice on different surfaces to see how the markers perform and how the colors appear. Experiment with different techniques, such as blending colors or creating gradients, to discover your own unique style. Take your time and be patient; it may take a few tries before you achieve the desired results. Don’t be afraid to make mistakes and learn from them; that’s part of the creative process. -
Troubleshooting Common Paint Marker Issues
If you encounter common paint marker issues, here are some troubleshooting tips: Clogged tip: Wipe the tip with a clean cloth or paper towel, or soak it in warm water to unclog it. Streaky lines: Shake the marker well before use and make sure to apply even pressure when using it. Fading colors: Use markers labeled as lightfast or apply a sealant to protect the artwork from UV rays. Bleeding or smudging: Allow each layer to dry completely before applying the next, or use a fixative spray to prevent smudging.